


Table of Contents
- Why Hemming a Jumpsuit for Heels Matters
- What You'll Need to Hem a Jumpsuit
- How to Measure Inseam for Heels
- Trying On and Marking Your Jumpsuit
- Hemming Methods: From Sewing Machine to No-Sew Options
- Step-by-Step Hemming Process
- Troubleshooting Common Hemming Problems
- Styling Your Hemmed Jumpsuit with Heels
- Frequently Asked Questions
Last Updated: October 10, 2026
Why Hemming a Jumpsuit for Heels Matters
A jumpsuit is a one-piece outfit that covers both legs. When you wear heels, the hem length changes. Your legs look longer in heels than in flats. This means a jumpsuit hemmed for flats will drag on the ground when you wear heels.
Jumpsuits are trending for nights out and special events. A perfectly hemmed jumpsuit paired with the right heels creates a polished, head-turning look. The problem is that most people don't know how to hem a jumpsuit for heels properly. A sloppy hem ruins the whole vibe.
Here's what most guides miss: jumpsuits are harder to hem than regular pants. You're working with one continuous piece of fabric. You can't try on one leg at a time. The fit changes when you move.
What You'll Need to Hem a Jumpsuit
Before you start, gather the right tools. You don't need much, but having everything ready makes the process smoother.
Essential tools:
- Measuring tape
- Pins or fabric clips
- Sharp scissors (fabric scissors work best)
- Needle and thread (or a sewing machine)
- Iron and ironing board
- Chalk or fabric marker
Optional but helpful:
- Seam ripper (for removing old stitches)
- Hemming tape (for no-sew options)
- Overlock machine (for finishing raw edges)
- Sewing machine with hemming foot
If you don't have all these items, don't worry. You can hem a jumpsuit with just pins, scissors, needle, and thread. Start simple and upgrade your tools as you gain confidence.
How to Measure Inseam for Heels
Measuring your inseam correctly is the foundation of a good hem. This is where most people go wrong. They measure without heels on. Then the jumpsuit looks wrong when they actually wear it.
Here's the right way to measure inseam for heels:
Put on the exact heels you'll wear with the jumpsuit. Stand barefoot in front of a mirror first. Have someone help you measure from your hip bone down to your ankle. Write this number down.
Add the heel height to your original measurement. This gives you the correct finished length.
The key is wearing the actual heels you plan to pair with the jumpsuit. Different heel heights change everything. A 2-inch block heel is different from a 4-inch stiletto.
Trying On and Marking Your Jumpsuit
This step separates good hems from bad ones. You need to try on the jumpsuit with your heels and mark where it should end.
Steps for trying on and marking:
- Put on the jumpsuit with the heels you'll wear
- Stand in front of a full-length mirror
- Look at where the hem hits your ankle
- It should just touch the top of your heel or break slightly on the shoe
- Use chalk or a fabric marker to mark this line on both legs
- Mark the inside seam, the center front, and the outside seam on each leg
- Have someone help you check that both legs are marked at the same height
This is crucial. Many people mark one leg correctly and forget to check the other leg. Legs are not always the same length. You might need different hem lengths on each side.
Walk around in the jumpsuit while wearing the heels. Sit down. Move your legs. Make sure the hem doesn't drag or pull. Once you're happy with the length, you're ready to hem.
Hemming Methods: From Sewing Machine to No-Sew Options
You have choices for how to hem. Your best option depends on your skill level, the fabric, and how much time you have. Let's break down each method.
How to Hem Pants Without a Sewing Machine
Not everyone has a sewing machine, and that's fine. You can hem a jumpsuit by hand or with hemming tape.
Hand sewing method:
This works for any fabric. It takes longer but gives you control. Use a needle and thread that matches your jumpsuit fabric. Tie a knot at the end of your thread.
Hemming tape method:
Hemming tape is a fusible web that bonds fabric together with heat. It's the fastest no-sew option. Fold your hem to the marked length. Place hemming tape between the folded fabric and the main pant leg. Follow the tape manufacturer's instructions.
Hemming tape works best on cotton, linen, and cotton blends. It's less reliable on stretchy fabrics like spandex or lycra. Test it on a scrap first if you're unsure.
How to Hem a Dress and Keep the Original Hem
Some jumpsuits come with a finished hem already. You don't want to remove that original hem if you can avoid it. Instead, fold the existing hem up and stitch it in place.
Measure your desired finished length from the top of the original hem. Mark this point. Fold the original hem up to your mark. Pin it in place. Now stitch through all the layers to secure the fold. This method keeps the finished edge intact and looks professional.
This works best when you're only shortening by 1-2 inches. If you need to remove more than 2 inches, you'll need to cut away the excess and finish the raw edge.
How to Hem Pleated Fabric
Pleated jumpsuits are tricky. The pleats create texture and bulk. Hemming them requires patience.
Steps for hemming pleated fabric:
- Identify where the pleats fall at the hem
- Fold your hem to the marked length
- Pin carefully so the pleats stay aligned
- Use a hand stitch or sewing machine to stitch slowly
- Keep pressure even so the pleats don't bunch
- Press the hem gently with a cool iron to set the stitches
The key is keeping the pleats straight while you work. If pleats bunch at the hem, your jumpsuit will look unfinished. Take your time. Go slowly. It's better to spend extra time and get it right.
Step-by-Step Hemming Process
Now let's walk through the actual hemming. This is where your marks become a finished hem.
Julee......Tie Up Platform Thick Heel →
Step 1: Pin and Fold the Hem
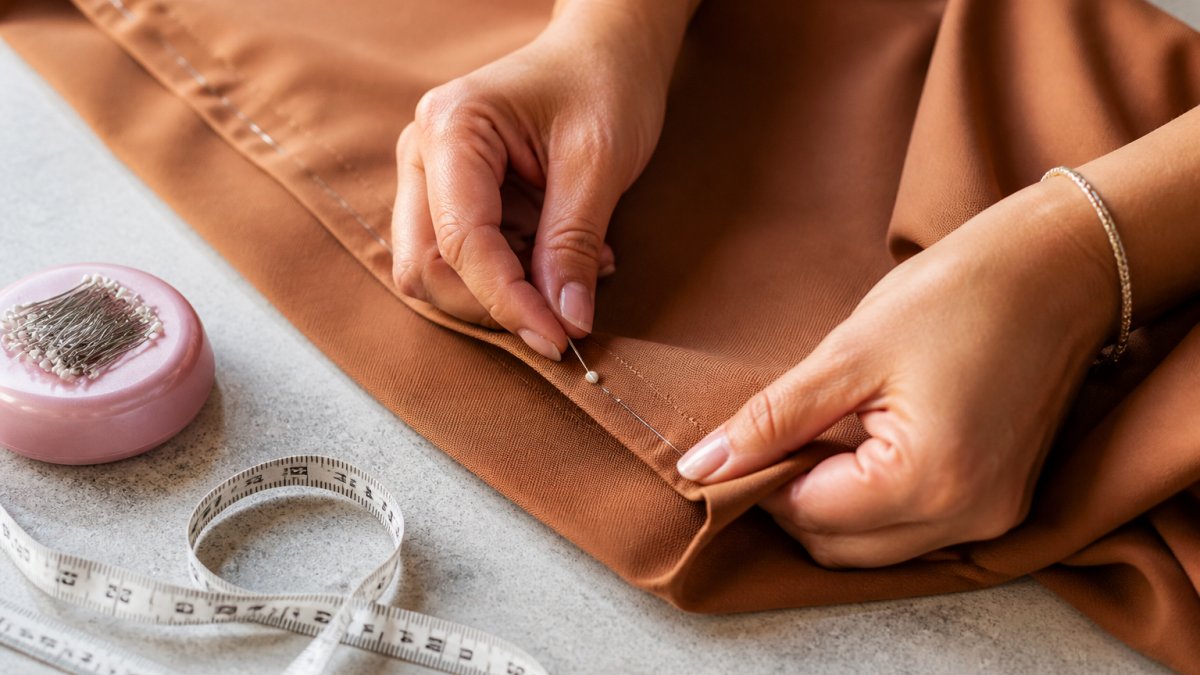
Fold the fabric up to your marked line. Use pins or fabric clips to hold the fold in place. Space pins about 2 inches apart. Pin on the inside of the leg so pins don't show on the outside.
Make sure the fold is straight and even. Look at it from both sides. The fold should be parallel to the ground. If it angles up or down, your hem will look sloppy.
Step 2: Press the Fabric
Use an iron to press the fold. This creates a crisp crease and makes sewing easier. Set your iron to the heat level recommended for your fabric. Too hot and you'll damage the material. Too cool and the crease won't hold.
Press from the inside of the leg. Move the iron along the fold. Don't press the pins. Once the entire hem is pressed, let it cool. The crease will hold better once it cools completely.
Step 3: Cut Away Excess Fabric
If your hem allowance is more than 1 inch, trim it down. Leave about 0.5 inches of fabric above your folded hem line. This gives you enough fabric to work with without creating bulk.
Use sharp scissors. Make straight cuts parallel to the fold. Don't cut at angles. Jagged cuts create frayed edges that are harder to finish.
Step 4: Stitch or Finish the Raw Edge
Now you stitch the hem in place. You have three options: machine stitch, hand stitch, or overlock stitch.
Machine stitch: Use a straight stitch about 0.25 inches from the fold. Stitch slowly and keep the line straight. Backstitch at the beginning and end to lock the thread.
Hand stitch: Use a whip stitch or blind stitch. These stitches are nearly invisible from the outside. They take longer but look the most professional.
Overlock stitch: If you have an overlock machine, use it to finish the raw edge and stitch the hem in one step. This is the fastest and most durable method.
Once you've stitched the hem, press it again with your iron. This sets the stitches and gives your hem a finished appearance.
Troubleshooting Common Hemming Problems
Even experienced sewers run into issues. Here's how to fix the most common problems.
Uneven hem: One leg is longer than the other. This happens when you don't measure carefully or when legs are naturally different lengths.
Wavy or puckered hem: The fabric bunches or ripples along the hem line. This usually happens with stretchy fabrics or when you pull too tight while sewing.
Fabric distortion: The jumpsuit pulls or twists when you hem it. This is common with one-piece garments. Solution: Don't stretch the fabric while working.
Raw edges showing: The cut edge of the fabric is visible from the outside. Solution: Fold the raw edge under before stitching.
Thread showing on outside: Your stitches are visible from the front. Solution: Use thread that matches your fabric exactly.
Styling Your Hemmed Jumpsuit with Heels
You've done the work. Now it's time to style your jumpsuit and show it off. The right heels make all the difference.
Pair your jumpsuit with heels that match the vibe. For a sleek, modern look, try clear heels like the Pensy Clear Sandal Heels from Swagg Bootique LLC. For a bold statement, the Julee Tie Up Platform Thick Heel features a wrap tie-up detail and platform that adds personality.


Block heels are perfect if you want stability. The Happier Clear Thin Strappy Block Heels have a square toe and padded insole for comfort. Or go classic with the Article Block Platform Heel Mules, which feature a chunky heel and slip-on design.

Accessories matter too. Keep jewelry simple so the jumpsuit is the focus. A small clutch and statement earrings complete the look.
Getting your jumpsuit hem right for heels is worth the effort.
| Hemming Method | Best For | Time Required | Durability |
|---|---|---|---|
| Machine stitch | Most fabrics | 30-45 minutes | Very durable |
| Hand stitch | Delicate fabrics | 1-2 hours | Very durable |
| Hemming tape | Quick fixes | 10-15 minutes | Moderate |
| Overlock stitch | Professional finish | 20-30 minutes | Most durable |
EXTERNAL CITATIONS:
For fabric care and pressing techniques, the [American Sewing Guild provides guidelines on proper iron temperature settings by fabric type | asg.org] to prevent heat damage during hemming.
The [Textile Fiber Products Identification Act requires accurate labeling of fabric content | ftc.gov], which helps you choose the right hemming method based on material composition.
According to [sewing experts at Threads Magazine | threadsmagazine.com], hand stitching with a whip stitch creates the most invisible hem finish for formal wear and special occasion garments.
Frequently Asked Questions
How much should a jumpsuit hem skim the floor when wearing heels?
When wearing heels, your jumpsuit hem should skim the top of your shoe with a slight break in the fabric. Aim for about 0.25 to 0.5 inches of clearance above the heel. This prevents the hem from dragging on the ground or getting caught while walking. Always try on the jumpsuit with the exact heels you'll wear to ensure the perfect finished length for your height and shoe choice.
Can you hem a jumpsuit without a sewing machine?
Yes, you can hem a jumpsuit without a sewing machine using fabric glue, hem tape, or hand-stitching. Fabric glue and hem tape work best for jumpsuits made from lightweight fabrics and create a temporary or semi-permanent hold. Hand-stitching with a needle and thread is more durable and gives you full control, though it takes longer. For a one-piece garment like a jumpsuit, hand-hemming offers more flexibility since you can work on one leg at a time.
How do you keep both jumpsuit legs the same length?
Measure both legs from the same starting point, like the crotch seam, to ensure even length. Mark the finished length on both legs using tailor's chalk or a fabric pencil while wearing the jumpsuit and heels. Have someone help you check that both legs hang at the same height, or use a mirror to compare. Pin both legs before cutting to avoid mistakes, and cut gradually rather than all at once to maintain symmetry.
What hem allowance should I use when hemming a jumpsuit?
A hem allowance of 0.5 to 1 inch is standard for most jumpsuit fabrics. This gives you enough fabric to fold, press, and create a secure stitch without the hem being too bulky. For thicker or pleated fabrics, use a 1-inch allowance to accommodate the extra fabric. Always leave extra allowance if you're unsure; you can trim it down, but you can't add fabric back once it's cut away.